One of the most common ways for an administrator to see if a particular server is up or not is to send an ICMP package to the server or to Ping it. This is also called an Echo Request.
Windows Server 2008 disable this Echo Request by default. Here's how you can turn this on:
1. Open Server Manager
2. Expand Configuration section
3. Expand Windows Firewall with Advanced Security (OK, Microsoft, is there a Basic one???)
4. Click on Inbound Rules
5. In the middle pane, scroll down and find "File and Printer Sharing (Echo Request - ICMPvX-in)" where the X stands for the IP version number
6. Right click it and select Enable
7. If you want to edit advanced options then right click it and select Properties option instead
If you are running the core version, you can accomplish the same thing by issuing the netsh command:
netsh firewall set icmpsetting 8
Thursday, December 27, 2007
IIS 7 - FTP Server
I was evaluating the much anticipated Windows Server 2008 RC1 and one of the areas I was focusing on was IIS7. Pretty much every component was updated except for the FTP server. It seems that Microsoft was rushing RC1 out and didn't have enough time to add the new FTP server in there so they went with the old version instead.
When you enable FTP role, the old IIS 6 snapin will be added to let you manage the FTP server. I didn't like the way it turned out and searched around a bit more and found out FTP Server 7 RC0 is out.
You can download the new FTP Server here. In order to install this package, you must first uninstall the old FTP version.
Wednesday, December 26, 2007
Start a Port Configuration In a Clean State
If you are reconfiguring or changing the port settings on a router you can remove or change the old commands one by one until the job is done. However, there's a "default interface" command that you can use to quickly reset the port's configuration to its default values:
Router(config#): default interface fa0/1
Once the "default interface"command issued, you can be certain that all previous commands set on the specified ports are gone.
Router(config#): default interface fa0/1
Once the "default interface"command issued, you can be certain that all previous commands set on the specified ports are gone.
Thursday, December 20, 2007
Protecting Your Network Edge with TTL
Protecting your network by authenticating every EBGP session is a good measure to keep the bad guys out. While this approach can keep attackers from getting inside your network, it can't keep them from launching attacks by flooding packets at BGP port (TCP port 179) and causing tremendous authentication failures which can lead to legistimate BGP connections at the target interface to fail, BGP process failure or even system crash due to spike in system resources & CPU spike.
Fortunately, you can use TTL (Time To Live) as an additional measure to reduce such DoS attacks against BGP. The default behavior of most BGP implementations is that it will send packets to external neighbors with a TTL value of 1 and accepts packets from external neighbors with TTL of 0 or higher.
You can tighten up your network by changing this default behavior by having BGP originated packets with a TTL value of 255 and only accepting packets with TTL of 254 (measured after the local router has decremented the TTL of the packet it received) or higher.
Now even if the attackers originate packets with a maximum TTL value of 255, the packets can't get to your BGP network if the attackers are not directly connected to the target interface. This is because each router hop decrements the TTL value by 1. If they are two hops away, by the time the packets reach the port TTL will be decremented to 253 and will be rejected.
You can configure the TTL value by issuing the statement:
neighbor-address ttl-security hops 254
This will instruct your router to discard incoming BGP packets with TTL value below 254 and also set outgoing packets TTL value to 255. You will need to make sure that both neighbors are configure with the same statement.
Monday, December 17, 2007
The Day The Routers Die
Those of us that are in the networking field might find this video amusing.
Note: In the song, the performer (Gary Feldman) mentioned RIPE55 quite a few times. RIPE stands for Réseaux IP Européens (European IP Networks) which is a forum open to all parties who are interested in the technical development of internet and 55 is the meeting number during which he performed the song.
Gary sung in native English accent so it might be a bit hard to understand. Here's a to link the lyrics.
Escape SQL strings
As part of my development job, I often create and troubleshoot SQL queries. And one of such tasks is validating SQL data to make sure the query would return the correct data set as expected.
Time and again, I would run into queries like:
Select blah blah From Table1 Where FieldName In ('abc', 'efd'.....)
Dealing with a short list doesn't involve a lot of typing so it's not a big deal. But when facing a large list, this can be a daunting task as you have to escape the strings and separate them by commas.
This is where Excel spreadsheet comes in handy. In Excel you can do a simple formula to take care of this by typing the following in a cell:
="'" & A1 & "',"
What this does is it takes the value in cell A1 and wrapped it with a single quote and then adds a comma at the end. You can replicate this formula to other cells and it should save you quite a bit of typing.
If you have a list of strings like:
abc
edf
123
all you have to do is copy and paste it in the Excel spreadsheet created with the formula above and you will have a list of escape strings that you can place in your IN criteria. I use this a lot and it saves me a whole lot of typing.
Don't forget to take out the last comma. See attached file for more info.
Sunday, December 16, 2007
Windows 2008 Hyper-V Installation - Login
I was checking out Windows 2008 Hyper-V RC1. Downloaded the ISO image and installed it. Everything went pretty well with minimum user intervention. After a couple of auto reboots the login window appeared and I had only one option - Other Login (for the core installation).
I was scratching my head trying to figure out what login I can use since the installation didn't ask me to create any login. So I tried out a couple of well known default username and password and finally I got in with the Administrator & blank password combination.
Once I logged in, I was presented with the good old Command prompt. For those of you who are used to the Windows interface, this might be a bit of a shocker.
The next thing I did was to enable Hyper-V in the core server deployment. This was done with the command:
Start /w ocsetup Microsoft-Hyper-V
A reboot is required once Hyper-V is enabled. Please note that the command is case sensitive so you must type the command exactly as seen here.
Tuesday, December 11, 2007
How to set up SQL Server to listen on multiple static TCP ports

Did you know you can have your MS SQL Server listen on multiple TCP ports? I find this feature very useful since I run my DB server on a specific port and often run into clients that require to have database connection on a different port because it falls inline with their security practice.
Here's how you can do it:
1. Start SQL Server Network Utility
2. Select TCP/IP and click Properties button
3. Enter the port numbers (separated by commas)
4. Click OK twice
5. Stop & restart SQL Server for the change to take effect
Tuesday, December 4, 2007
Terminal Services Client (MSTSC) and Vista/2008
A few months back, I wrote a blog about as you can see here.
Well, in the newer version of MSTSC for Windows Vista and Windows 2008, the "/console" option is no longer available. However, you can use a new switch "/admin".
This new switch has an advantage that "/admin" session can still be created when the session count has maxed out. Also, the "/admin" sessions don't count toward the session limit that may be configured on a terminal server to limit the number of sessions.
Sunday, November 4, 2007
Unable to Start Debugging on the Web Server
One of the error you'll probably run into when setting up a new ASP.net project is the "Unable to Start Debugging on the Web Server". Most of the time, this error can be fixed by enabling Integrated Windows Authentication. You can do this by:
1. Launch IIS Management Console.
2. Right click on the website and select Properties.
3. Click on the Directory Security Tab.
4. Check the box that reads "Integrated Windows authentication".
If that doesn't work, you'll need to make sure that Keep HTTP-Alives Enabled option is checked. And if all fails, register the .net framework again and check your permission settings.
Good Luck!
Friday, October 19, 2007
Iterate through HashTable
What is a Hashtable?
A Hashtable is a collection type object that is used to store key-value combinations. In a way, it's very similar to a good old Dictionary object. You can retrieve stored value/object by either keys or by associated value. However, the performance is at its best when you search with keys.
Let's see how we can create and use a hashtable:
Dim htCars As New Hashtable
htCars.Add(1, "Buick")
htCars.Add(2, "Chevy")
htCars.Add(3, "GM")
Dim myCar As String
myCar = htCars.Item(2)
This code fragment creates a hashtable object and adds three items to it. Then it calls the Item property to get the value for item with key 2. Item is the default value for the hashtable so myCar = htCars(2) would have produce the same result.
OK, so you've got a hashtable built and can get a single value out of it. But how do you iterate through all the items that were stored in it?
One way to do this is to use the Keys collection to pull out the values:
Dim carID As Integer
For Each carID In htCars.Keys
Console.Writeline(carID & " - " & htCars(carID))
Next
Another way is to use the DictionaryEntry object as in:
Dim dictEntry As DictionaryEntry
For Each dictEntry In htCars
Console.Writeline(dictEntry.Key & " - " & dictEntry .Value)
Next dictEntry
And last but not least, you can run through all the items stored in the hashtable by obtaining the enumerator object through the IDictionaryEnumerator which is returned by the GetEnumerator function:
Dim myEnumerator As IDictionaryEnumerator = htCars.GetEnumerator()
While myEnumerator.MoveNext()
Console.Writeline(myEnumerator.Key & " - " & myEnumerator.Value)
End While
Hashtable are easy to use, efficient & fast. I often use it to preload frequently use data like reference tables and it really improves the application performance nicely.
Monday, October 15, 2007
Using Enumerations To Document Your Code
Enumeration is a great way to assign easy to understand & remember textual names to your values. Consider the example:
Public Sub CityWork(ByVal CityID As Integer)
If CityID = 0 Then
'do something
ElseIf CityID = 1 Then
'do something
ElseIf CityID = 2 Then
'do something
Else
'do something
End If
End Sub
By the look of that, the code is pretty hard to understand as you have to remember what all those numbers are to associate with their function. To clarify things a bit, we can modify the above code using enumeration:
Public Enum CityTypes
SanDiego
SanFrancisco
SanJose
End Enum
Public Sub CityWork(ByVal CityID As CityTypes)
If CityID = CityTypes.SanDiego Then
'do something
ElseIf CityID = CityTypes.SanFrancisco Then
'do something
ElseIf CityID = CityTypes.SanJose Then
'do something
Else
'do something
End If
End Sub
Now this code is pretty much self-documented. It makes it so much easier to understand and will also allows you to take advantage of intellisense to help you code faster.
By default, the first enumerated value (SanDiego in this case) will have a value of 0. You can change that by explicitly assign an integer to it. The next enumerated value, if not specified, will be increased by 1 from the previous value (SanJose = 6)
Public Enum CityTypes
SanDiego = 1
SanFrancisco = 5
SanJose
End Enum
If you write your code this way, you'll find that it's much easier to understand, you can code faster, it's less prone to errors and at the same time, you pretty much self-documented the code.
Friday, October 12, 2007
Troubleshooting ASP.net Application with CustomErrors
There are many ways to troubleshoot IIS application errors. Here I will discuss a simple yet effective way to troubleshoot your IIS applications.
In the Web.config, under System.web node, there's one section called customErrors. By default this is commented out and the mode set to
<system.web>
<customerrors mode="RemoteOnly">
<system.web>
With this setting in place, if you run into some error, chances are you will only see a generic runtime error that reads:
An application error occurred on the server. The current custom error settings for this application prevent the details of the application error from being viewed remotely (for security reasons). It could, however, be viewed by browsers running on the local server machine.
In order to see what's going on, you will need to modify the Web.config file so the customErrors tag read:
<system.web>
<customerrors mode="Off">
<system.web>
Note that this should only be done on development workstations as the detailed error message could expose information you don't want users to see like identity impersonation information... As for production, try to run the application on the server to see the error.
Now that you can see what's actually causing the error, it should be easy to narrow the problem to a particular line number and take corrective action.
Thursday, October 11, 2007
Fixing Fail To Access IIS Metabase Error
I often run into this error message for various reasons like doing a reinstallation, machine upgrade or preparing a workstation for a new co-worker...
This error is fairly simple to fix but if you don't know how, it could drive one crazy. You often run into this error after you install Visual Studio 2005 and then try to run a webpage on your machine. The error you encounter will read something like this:
Failed to access IIS metabase.
If so, you may have installed IIS after the .NET framework has been installed. To fix this, try to repair your ASP.NET installation and set up all of the appropriate ISAPI extension mappings using the aspnet_regiss utility in the .NET framework folder.
aspnet_regiis -i
This utility is found in the .NET framework version number under your Windows installation folder.
Tuesday, October 9, 2007
Configure DNS or Disable DNS lookup
If you mistype a command in the Privileged Mode on Cisco router, by default, the router thinks you're trying to connect to a remote host through Telnet. So it performs a DNS lookup on the information you entered.
If you haven't configured DNS on the router, the command prompt will hang until the DNS lookup timeouts. This is one of the thing that really bothers me so to resolve it, I have two options:
The first option is to disable DNS using the "domain-lookup" command as in:
Router(config)# no ip domain-lookup
The second option is to properly configure DNS and point it to a valid DNS server. Here's an example:
Router(config)# ip name-server 4.2.2.1
By configure the router using one of the two options above it will save you a bit of time and cut a bit of frustration out of your daily routines.
Sunday, October 7, 2007
Truncate SQL Logfile
In the last blog, I discussed the process of shrinking the database size to make it easier to move around. The process involved detaching the database and reattaching it. I've an email from one of the readers asking if this can be done while the database is online.
Well, the answer is yes. You can shrink the log file while the database is up. There are two commands that one can use to truncate a log file to reduce its size. They are Backup Log and DBCC ShrinkFile.
Backup Log demo01 with truncate_only
DBCC ShrinkFile('demo01_log', 1)
The commands above will truncate the log file and reduce its size to one megabytes. Before this is carried out though, I highly suggest that you backup your database first.
Monday, October 1, 2007
How To Truncate Log File In SQL Server 2005
I as part of my development role, often perform database backup/restore operations and move the databases from one server to another (ie: development to test, to QA...). One issue I often encounter is the amount of data I have to transfer from one server to another. If the server is on a local network then it's not a big deal but if it goes out to a remote data center then I want to cut the file size down as much as I can.
I accomplished by eliminating the log file thus trim down a nice portion of unnecessary data. Here are the steps:
1. Take the database offline
2. Detach the database
3. Delete or rename the log file
4. Attach the database without the log file (highlight the log file and click Remove button)
SQL Server should create a new log file for your database. At this time, I backup the database and send it to the new server. I find this process has helped me save a quite a bit of time, especially when setting up the database on a remote server.
Thursday, August 30, 2007
Disable Windows Error Reporting
Every now and then I run into one of these application or system error that pops up the Error Reporting dialog box. This is one way Microsoft is getting the feedback from users on how well (or not) their software is performing or interacting with other applications and improve their products.
This is fine with me but sometimes, it gets really annoying when the same error keeps occurring and you have to report, wait and then close the dialog box or choose not to report it. To get rid of this headache once and for all, you can turn off this feature completely.
1. Launch System Properties dialog box
2. Click on Advanced Tab
3. Click on Error Reporting button
4. Select "Disable error reporting" radio button
5. Click OK twice to exit
You can launch System Properties dialog box through the Control Panel or by Right Click on My Computer then select Properties. Another way to bring it up is to press the [Windows][Break] key combinations.
Monday, August 20, 2007
Configure Interface - Cisco vs. Procurve
In Cisco IOS, you can switch from one interface from another real easy. The Interface command moves you from one interface to another without having to Exit every time you configure an interface.
With Procurve switch, you don't have the same kind of flexibility. Everytime you configure an interface, you would need to Exit out to Configuration mode before you can enter another interface.
Let look at this example on a Cisco switch:
Int g0/1
desc "IBA LAN"
Int g0/2
desc "ESV LAN"
That's perfectly legal on the Cisco IOS. Now configure that on a Procurve switch:
Int g0/1
name "IBA LAN"
exit
Int g0/2
name "ESV LAN"
If you miss Exit command, you'll received an "Invalid Input" error because you can not go to a different interface from within an interface. I never like this approach and prefer the shortcut where you enter two commands on one single line. Not only it cuts out the Exit command but keeps you in the Config mode.
Int g0/1 name "IBA LAN"
Int g0/2 name "ESV LAN"
Monday, August 13, 2007
Web Application Security
Web applications are at great risks due to the fact that most applications are widely available to anyone with internet access. They often get compromised by script exploits.
Most script exploits require the application to accept malicious input and inject it into a page where it will be executed on the server or in the client browser. The potential damage from such an exploit depends on the script that is being executed (taking over a system, install malware, deleting data...)
The primary defense against script exploit is to never trust the information obtained from users. This apply to both incoming and outgoing data from users (data written to and data pulled from database).
There are many things a developer can do to protect application against script exploits. Data input by users should always be validated. Form elements should be HTML-encoded. Dynamic SQL might be flexible but yet it can compromise your data. Consider parameterized query against SQL queries using string concatenation.
In this simple example:
"Select * From Customers where LastName = " & txtLastName.Value
A malicious user who knows a something about database could turn that SQL statement into:
Select * From Customers Where LastName = 'a'; Delete From Customers Where LastName > ''
And when it gets executed, the database is compromised.
It is very important to understand how users and their data interact with your application. That way you can better protect your data, application and users from script exploits.
For more information on how to protect your web application see Basic Security Practices for Web Applications.
How To Set Access Key For ASP.net Web Server Controls
Access key combination allows users to press ALT key plus another key to focus or jump to a specific control.
Some controls have Access property where you can set this like TextBox or ListBox. As an alternative, you can set an Access key for a Label control and then tell the browser to associate it with another control. With this approach, you can use the Label control as caption to indicate the access key with an underlined letter.
To set the access key using label control you must:
1. Add the control to be associated
2. Add a Label control
3. Set the access key
4. Associate the control to receive focus
Here's an example:
<asp:Label ID="lblLastName" runat="server"
AccessKey="L"
AssociatedControlID="txtLastName"
Text="<u>L</u>ast name: ">
</asp:Label>
<asp:TextBox ID="txtLastName" runat="server"></asp:TextBox>
Note that setting focus by using access key from a Label control requires that client scripting is enabled in the browser.
Download File with Visual Basic
My.Computer.Network namespace provides the DownloadFile method which can be used for downloading a remote file to a specific location.
The basic syntax for calling DownloadFile method is to specify the file's location as a string or URI and the location to store the file as seen below:
My.Computer.Network.DownloadFile("http://www.server.com/readme.txt", "c:\docs\readme.txt")
The overloaded methods allow you to specify more advanced parameter like timeout, username & password for protected file. The example below downloads password protected file.
My.Computer.Network.DownloadFile("http://www.server.com/readme.txt", "c:\docs\readme.txt", "myusername", "mypassword")
Note that FTP protocol is used by the DownloadFile method to send information including username & password in plain text. It should not be used to transmit sensitive information.
Tuesday, July 31, 2007

Tuesday, July 17, 2007
Cisco Command Aliases
Alias command allows you to define aliases for long commands. Alias command breaks down into three modes:
Alias Exec for Privileged Mode.
Alias Configure for Global Configuration Mode.
Alias Interface for Interface Configuration Mode.
Let say that you want to shorten Show Running-Configuration command to just two keystrokes, you could define it as follow:
Router(Config)# alias exec sr Show Running-config
Or if you want to use ns to perform No Shut command on an interface you could define it as:
Router(Config)# alias interface ns no shutdown
So now instead of typing out all those long commands you could type sr for show runn or ns for no shut down and still achieve the same desired effects.
Cisco IOS includes some built-in command aliases. You can view these aliases by using the "show alias" command. Here are the default command aliases:
- h - help
- lo - logout
- p - ping
- r - resume
- s - show
- u - undebug
- un - undebug
- w - where
Monday, July 16, 2007
Show Running-Configuration
One of the most commonly used command when troubleshooting a switch or router is the "Show Run" command. It gives you an insight into the currently running configuration.
Sometimes, this command yields so much output one would be overwhelm with the amount of text on the screen and have to keep pressing the space key to scroll down to see more information.
Well, if you know what you are looking for then you could add a command prefix " begin keyword" and it'll start showing the configuration from that where the keyword occurs.
SwitchA# Show runn | begin spanning-tree
In the example above, the switch will show the current configuration from the line where it finds the first occurrence of the word "spanning-tree".
Using this command can really save you all the trouble of spacing through all the text only to find that you go too fast and miss the relevant information and have to scroll back to look for it.
Funky Name
 I had a little time to spare and wanted to have some fun to relieve the stress so I created a little application that generate some funky names based on the user's input.
The name generation logic is based on a children's book, Captain Underpants And the Perilous Plot Professor Poopypants, by Dave Pilkey, in which the evil Professor forces everyone to assume new names...
The program uses some simple one dimensional arrays and use the user's input to index into the arrays and generate the new name. It also makes use of the one click deployment option.
Pretty funny. Give it a try.
The program can be downloaded from http://www.meshflowers.com/FunkyNames/
Tuesday, July 3, 2007
Reading XML File Using XMLDocument Object
In the previous blog, I discussed how to read XML file using XMLTextReader object of the System.XML namespace. In the same namespace, we also have XMLDocument which can also be used to read XML files.
You can use the Load method to read an XML file and process the elements using XPath selection if you know the structure of the XML document as follow:
Dim myXmlDoc as New XmlDocument
Dim myNode as XmlNode
myXmlDoc.Load("Cars.xml")
myNode = myXmlDoc.SelectSingleNode("/car/honda")
myTextBox.Text = myNode.InnerXml & vbCrLf
The XmlNode object provides the NextSibling method which can be used to move to the next element or node.
myNode = myNode.NextSibling
myTextBox.Text &= myNode.InnerXml
Now that works fine if you know the the structure of the XML document. If you don't know the structure, you can navigate through the document using FirstChild and NextSibling methods.
myNode = myXmlDoc.FirstChild
While myNode.NodeType <> XmlNodeType.Element And Not myNode Is Nothing
myNode = myNode.NextSibling
End While
myTextBox.Text = myNode.InnerXml
 This will dump everything in that node to the textbox including the element names and attributes.
It's not possible to cover all the methods and properties of the XMLDocument and XMLNode in a short blog, but I hope this will get you going.
Further reading should be done on the following topics: XMLDocument, XMLNode, XMLAttribute, FirstChild, HasChildNodes, InnerText, InnerXML...
Download the sample project here.
You can use the Load method to read an XML file and process the elements using XPath selection if you know the structure of the XML document as follow:
Dim myXmlDoc as New XmlDocument
Dim myNode as XmlNode
myXmlDoc.Load("Cars.xml")
myNode = myXmlDoc.SelectSingleNode("/car/honda")
myTextBox.Text = myNode.InnerXml & vbCrLf
The XmlNode object provides the NextSibling method which can be used to move to the next element or node.
myNode = myNode.NextSibling
myTextBox.Text &= myNode.InnerXml
Now that works fine if you know the the structure of the XML document. If you don't know the structure, you can navigate through the document using FirstChild and NextSibling methods.
myNode = myXmlDoc.FirstChild
While myNode.NodeType <> XmlNodeType.Element And Not myNode Is Nothing
myNode = myNode.NextSibling
End While
myTextBox.Text = myNode.InnerXml
This will dump everything in that node to the textbox including the element names and attributes.It's not possible to cover all the methods and properties of the XMLDocument and XMLNode in a short blog, but I hope this will get you going.
Further reading should be done on the following topics: XMLDocument, XMLNode, XMLAttribute, FirstChild, HasChildNodes, InnerText, InnerXML...
Download the sample project here.
Friday, June 29, 2007
Reading XML File Using XMLTextReader
System.XML namespace provides us with the XMLTextReader class which we could use to read and process XML files.
The most commonly used attributes are .Name and .Value which returns information of about the elements and their associated information.
 MoveToNextAttribute method is used to navigate to the next element. The project below uses an OpenFileDialog box to get the XML file which is then passed to XMLTextReader object and open it. Then the Read method is called to read in and processed the entire XML file and put its content into a textbox.
In my opinion, reading XML this way is rather confusing. I like reading XML file using XMLDocument object better as it’s very simple and gives you a much clearer view of the whole process.
This sample project can be downloaded here.
The most commonly used attributes are .Name and .Value which returns information of about the elements and their associated information.
MoveToNextAttribute method is used to navigate to the next element. The project below uses an OpenFileDialog box to get the XML file which is then passed to XMLTextReader object and open it. Then the Read method is called to read in and processed the entire XML file and put its content into a textbox.In my opinion, reading XML this way is rather confusing. I like reading XML file using XMLDocument object better as it’s very simple and gives you a much clearer view of the whole process.
This sample project can be downloaded here.
Tuesday, June 26, 2007
ListBox - Select Multiple Items
I've seen quite a number of forums posts asking how to get the selected items of a listbox when the listbox selection mode has been changed to allow for multiple items to be selected. It's actually pretty simple to do in .net.
 What you need to do is to loop through the SelectedItems collection to get to the items that have been selected. The list box also has a property called SelectedIndices that you can use.
Download the zip file to see the sample code on this which also shows you how to add a name-value pair item like we used to do in VB6.
Thursday, June 21, 2007
Using Meta Tags
Web pages are only useful if you have people accessing them. People only come to your site if they know how to get to it. If your site isn't well established then you need to depend on search engines to advertise your pages to the rest of the world. One way of doing that is through the use of Meta Tags.
Most web developers are too focused on creating the page content, they often overlook Meta Tags. Here, I'll discuss some of the commonly used Meta tags.
Description Meta tag describes what the page or site is about. The syntax for this is:
<Meta Name="Description" Content="Page description">
Keywords Meta tag contains the keywords that would be relevant to the page/site. For example:
<Meta Name="Keywords" Content="Web, Programming, Blog">
Description & Keywords often go hand in hand. You could apply this at the site level (all pages have the same descriptions & keywords) or at the page level (all pages have different descriptions and keywords). I’ll talk more about this in search engine ranking blog.
Author Meta contains the name of the person who published the page:
<Meta Name="Author" Content="Brian Dao">
Revisit-After Meta tag tells the web crawlers or spiders to revisit the page after certain period has passed.
<Meta Name="Revisit-After" Content="7 days">
Robots Meta tag can instruct the crawlers to index the page and whether to follow the links found on the site or not:
<Meta Name="Robots" Content="index, follow">
These are just a few things you can do to help published your webpages and get them indexed with the search engines and not optimizing your site for better ranking in search engine index as I'll talk about that in another blog.
Tuesday, June 12, 2007
Changing IP on Cisco/ProCurve Switch
Let's say we have the IP address 10.10.10.1/24 assigned to vlan 1 and want to change it to 10.10.10.2. On a Cisco switch, you can telnet in and send these commands to the switch:
conf t
interface vlan 1
ip address 10.10.10.2 255.255.255.0
conf t
interface vlan 1
ip address 10.10.10.2 255.255.255.0
The Cisco switch will update the IP address and disconnect your session. On a ProCurve switch, if you issue the same commands it will spit out an error saying:
"The IP address (or subnet) 10.10.10.2/24 already exists."
If you were going through the console port, you can set the new IP using the following commands:
conf t
vlan 1
no ip address 10.10.10.1/24
ip address 10.10.10.2/24
However, you can't do that if you connect to the switch remotely. As soon as the "no ip address" command is received and processed by the switch, your session will be disconnected and you won't be able to get to the switch. The trick to get around this issue is to make this IP address change through the switch's built-in menu system instead of using the plain old CLI.
1. Type "menu", hit Enter
2. Select "Switch Configuration"
3. Select "IP Configuration"
4. Navigate to Edit, hit Enter
5. Change the IP and then Save
You will be disconnected once you save it but you will be able to reconnect using the new IP.
Cisco Switch - TFTP IOS Upgrade
Update, Copy, Backup, Restore IOS and startup-config are pretty much done in the same manner. First, you've got to configure the switch and the PC to talk then run the TFTP or FTP server and start the copy process.
Let's walk though how you can update Cisco IOS on a 6500.
Router> enable
Router# configure terminal
Router(config)# interface gig 9/1
Router(config-int)# switchport
Router(config-int)# switchport mode access
Router(config-int)# switchport access vlan 1
Router(config-int)# no shutdown
Router(config-int)# exit
At this point, we have turn port 9/1 into a layer 2 port on vlan 1. Now we need to assign an ip address to this default vlan so we can communicate to it.
Router(config)# interface vlan 1
Router(config-int)# ip address 10.10.10.1 255.255.255.0
Router(config-int)# no shutdown
Router(config-int)# exit
 The next thing we need to do is to configure the network adapter on your PC or laptop and give it an address that's on the same network as the switch. In this case, I set it to be 10.10.10.2 255.255.255.0.
Plug in the cable from the PC to the port we just configured; and to make sure the PC can talk to the 6500 we can try pinging it:
Router(config)# do ping 10.10.10.2
If you have a successful ping reply then you should be good to go. Launch the TFTP server and start the copy process. To copy from data from TFTP server to the switch use:
Router# copy tftp: disk0:
After you issue either of this command, you will be prompted for the FTFP server address and filename. Enter 10.10.10.2 and the filename you want to copy, then confirm it to start the copy process.
And to copy data from flash to FTFP server use the command:
Router# copy disk0: tftp:
If you are copying a rather large file then you should use FTP instead of TFTP and issue the command:
Router# copy FTP: Disk0:
I have run into some issue while moving a large file to the Cisco 6509. See this blog for more details.
Let's walk though how you can update Cisco IOS on a 6500.
Router> enable
Router# configure terminal
Router(config)# interface gig 9/1
Router(config-int)# switchport
Router(config-int)# switchport mode access
Router(config-int)# switchport access vlan 1
Router(config-int)# no shutdown
Router(config-int)# exit
At this point, we have turn port 9/1 into a layer 2 port on vlan 1. Now we need to assign an ip address to this default vlan so we can communicate to it.
Router(config)# interface vlan 1
Router(config-int)# ip address 10.10.10.1 255.255.255.0
Router(config-int)# no shutdown
Router(config-int)# exit
The next thing we need to do is to configure the network adapter on your PC or laptop and give it an address that's on the same network as the switch. In this case, I set it to be 10.10.10.2 255.255.255.0.Plug in the cable from the PC to the port we just configured; and to make sure the PC can talk to the 6500 we can try pinging it:
Router(config)# do ping 10.10.10.2
If you have a successful ping reply then you should be good to go. Launch the TFTP server and start the copy process. To copy from data from TFTP server to the switch use:
Router# copy tftp: disk0:
After you issue either of this command, you will be prompted for the FTFP server address and filename. Enter 10.10.10.2 and the filename you want to copy, then confirm it to start the copy process.
And to copy data from flash to FTFP server use the command:
Router# copy disk0: tftp:
If you are copying a rather large file then you should use FTP instead of TFTP and issue the command:
Router# copy FTP: Disk0:
I have run into some issue while moving a large file to the Cisco 6509. See this blog for more details.
Monday, June 11, 2007
ProCurve Switch - TFTP Flash Update
To update the IOS on the HP's ProCurve switches you first need to configure an access port so it can communicate to the TFTP Server.
ProCurve Switch 3500yl-48G> enable
ProCurve Switch 3500yl-48G# configure terminal
ProCurve Switch 3500yl-48G(config)# vlan 1
ProCurve Switch 3500yl-48G(vlan-1)# ip address 10.10.10.1/24
ProCurve Switch 3500yl-48G(vlan-1)# exit
Next, you will need to configure the network adapter on your PC or laptop and give it an address that's on the same network as the switch. In this case, I set it to be 10.10.10.2 255.255.255.0.
Then the next step is to connect your machine to the switch; plug a cable from your laptop or PC to the switch. And just to make sure that the data can travel from one end to another, we'll go ahead and try to send a ping to the server:
ProCurve Switch 3500yl-48G# ping 10.10.10.2
If the ping is successful, you need to launch your TFTP Server, then you can go ahead and update the flash by issuing the copy command and pass to it the server address and the filename:
ProCurve Switch 3500yl-48G# copy tftp flash 10.10.10.2 k_12_02.swi
And if you need to update the secondary flash, then issue this command:
ProCurve Switch 3500yl-48G# copy tftp flash 10.10.10.2 k_12_02.swi secondary
I make a habit of using scripts to make the whole process easier to manage and make the update faster so here's the entire script:
enable
configure terminal
vlan 1
no ip add
ip address 10.10.10.1/24
exit
ping 10.10.10.2
copy tftp flash 10.10.10.2 k_12_02.swi
y
copy tftp flash 10.10.10.2 k_12_02.swi secondary
y
Note: If you use this script, make sure that you update the ip address and change the filename.
ProCurve Switch 3500yl-48G> enable
ProCurve Switch 3500yl-48G# configure terminal
ProCurve Switch 3500yl-48G(config)# vlan 1
ProCurve Switch 3500yl-48G(vlan-1)# ip address 10.10.10.1/24
ProCurve Switch 3500yl-48G(vlan-1)# exit
Next, you will need to configure the network adapter on your PC or laptop and give it an address that's on the same network as the switch. In this case, I set it to be 10.10.10.2 255.255.255.0.Then the next step is to connect your machine to the switch; plug a cable from your laptop or PC to the switch. And just to make sure that the data can travel from one end to another, we'll go ahead and try to send a ping to the server:
ProCurve Switch 3500yl-48G# ping 10.10.10.2
If the ping is successful, you need to launch your TFTP Server, then you can go ahead and update the flash by issuing the copy command and pass to it the server address and the filename:
ProCurve Switch 3500yl-48G# copy tftp flash 10.10.10.2 k_12_02.swi
And if you need to update the secondary flash, then issue this command:
ProCurve Switch 3500yl-48G# copy tftp flash 10.10.10.2 k_12_02.swi secondary
I make a habit of using scripts to make the whole process easier to manage and make the update faster so here's the entire script:
enable
configure terminal
vlan 1
no ip add
ip address 10.10.10.1/24
exit
ping 10.10.10.2
copy tftp flash 10.10.10.2 k_12_02.swi
y
copy tftp flash 10.10.10.2 k_12_02.swi secondary
y
Note: If you use this script, make sure that you update the ip address and change the filename.
Programmatically Add Event Handlers to Controls At Runtime
If you have read my previous blogs, you'll see that I have discussed about how to add and remove controls at run time. Some controls created at runtime are pretty much useless if they have no event handlers attached to them.
What are event handlers? Think of event handlers as actions that are bound to controls. What action(s) would you want to carry out when certain things happen (ie: like a button is clicked, doubleclicked…)?
Let take a look at the following lines of code:
Dim newButton as Windows.Forms.Button
Dim i As Integer
For i = 1 To 5
newButton = New Windows.Forms.Button
newButton.Name = "btnButton" & i
newButton.Text = "Button " & i
newButton.Top = 20 + i * 30
newButton.Left = 40
Me.Controls.Add(newButton)
Next
The code block above will add 5 buttons to the form at runtime. But when you click on the buttons, nothing happen. Why? This is because at this time, there are no event handlers attached to the buttons.
Let make some modifications:
Public WithEvents newButton As Windows.Forms.Button
Private Sub Form1_Load(ByVal sender As Object, ByVal e As System.EventArgs) Handles Me.Load
Dim i As Integer
For i = 1 To 5
newButton = New Windows.Forms.Button
newButton.Name = "btnButton" & i
newButton.Text = "Button " & i
newButton.Top = 20 + i * 30
newButton.Left = 40
AddHandler newButton.Click, AddressOf ButtonClicked
Me.Controls.Add(newButton)
Next
End Sub
Private Sub ButtonClicked(ByVal sender As Object, ByVal e As EventArgs)
MsgBox("You clicked: " & sender.name &amp; vbCrLf & "Button name: " & sender.Text)
End Sub
Here the newButton has been redefined as a control with events and the AddHandler call attached the method ButtonClicked to the Click event of the control. Note that the control is declared as a global variable. You can’t declare a control with events as a local variable. The address of ButtonClick method is then bound or attached to newButton’s click event. Any time the button is clicked, ButtonClicked method will run and a message box will be displayed.
As you can see, it's pretty straight forward to add, remove and attached events to controls that are created on the fly. This blog only scratches the surface of these issues. You can further your study from these links:
Delegates and the AddressOf Operator
Events and Event Handlers
Download sample code: EventHandlers.zip
Sunday, June 10, 2007
Programmatically Remove Controls At Runtime
In the last blog, I discussed about how to programmatically add controls at runtime. This blog, we'll do just the opposite of that - removing controls programmatically.
The Controls collection offers a few methods that we can use to remove controls at runtime (Clear, Remove, RemoveAt).
Be careful when you call Remove or RemoveAt method though, as the Count property as well as the collection will be updated instantaneously and might produce undesirable result. Consider the following code snippet:
Dim i as Integer
With Me.Controls
For i = 0 to .Count - 1
If TypeOf .Item(i) is CheckBox Then
.RemoveAt(i)
Next
End With
This will work just fine if you have only one checkbox. However, if you have more than one checkboxes on the form, then it will remove every other one as the control collection is updated as soon as a control is removed resulting in a change in the Count property which messes things up and eventually throw an index out of range error.
To work around this, we'll have to remove the controls from the high end of the Count property as follow:
Dim i as Integer
With Me.Controls
For i = .Count - 1 To 0 Step -1
If TypeOf .Item(i) is CheckBox Then
.RemoveAt(i)
Next
End With
You can download the code for this blog here.
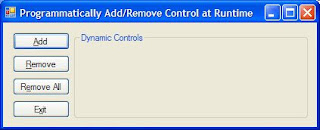
Programmatically Add Controls At Runtime
As I have experienced it, in some situations, you might not know the types of control or how many controls will be needed at design time. In these cases, you'd have to create the controls programmatically and dynamically add them to the form at runtime.
Adding controls at runtime is pretty simple:
Dim newControl as New Windows.Forms.CheckBox
newControl.Name = "chkCheckAll"
newControl.Text = "check all"
newControl.Top = 10
newControl.Left = 10me.Controls.Add(newControl)
The code snippet above will declare a checkbox and add it to the current form.
If you don't know the type of control then it'd be best to declare the new control as a generic control and then later modify to suite your need.
Dim newControl as Windows.Forms.Control
If createCheckBox Then
newControl = New Windows.Forms.CheckBox
Else
newControl = New Windows.Forms.RadioButton
End If
I find the .Tag property particularly helpful when working with controls dynamically. You can use it to store specific information about the control and you it later on when you process the control.
This blog only touches some of the properties for CheckBox & RadioButton as I try to keep the blog short. You should further explore their other properties to gain more understanding about them.
Now that you know how to add controls at runtime, let's see how you can programmatically remove them.
Friday, June 8, 2007
Cisco TFTP - Flash Update Problem
I was upgrading the IOS for the Cisco 6509s. I got Cisco TFTP Server setup and connected to it to download the file. The file was around 80Mb. TFTP Server threw an exception and shutdown. Upon restart, the file started to get downloaded but a few seconds later Cisco TFTP Server threw another error. This time I was able to view the error message and it said the transfer failed due to Synchronization Error.
I switched to SolarWinds TFTP Server and got a more detailed error saying the file was too large to be transferred through TFTP.
As an alternative, I used FTP Server from 3CDaemon and issued the command:
copy FTP: Disk0:
and it worked like a champ.
I had IIS running on my laptop so I turned off 3CDaemon and used IIS's FTP server. It worked out just fine.
So if you are transferring a large file you should use FTP and not TFTP to avoid potential problems and I also recommend 3CDaemon as it's got TFTP Server, FTP Server, Syslog as well as TFTP client all in one package.
Date Delimiter for Access and SQL Server
Microsoft's two most popular databases (MS Access & MS SQL Server) implement date delimiter differntly. This makes it hard to write queries that are compatible with both.
What I normally do this in situation would be creating a flag to indicate which database is being used and use the appropriate delimiter as follow:
Dim bAccessInUse As Boolean
Dim sSql As String
Function DateOut(byVal TheDate as String) as String
If bAccessInUse Then
Return "#" & TheDate & "#"
Else Return "'" & TheDate & "'"
End If
End Function
sSQL = "Select * From tablename Where date_col=" & DateOut(the_date)
If you use this function throughout your code and set and the flag by checking the connection string, you should have no problem making it run against either database without any modification.
Simple Way To Add Watermark
Here's a pretty simple way to add watermark to your image in VB6.
Private Sub Form_Load()
Dim Message As String
With Picture1
.AutoRedraw = True
With .Font
.Name = "Arial"
.Size = 18
.Bold = True
End With
Message = "Hello World"
.CurrentX = (.Width - .TextWidth(Message)) / 2
.CurrentY = (.Height - .TextHeight(Message)) / 2
End With
Picture1.Print Message
End Sub
Private Sub Form_Load()
Dim Message As String
With Picture1
.AutoRedraw = True
With .Font
.Name = "Arial"
.Size = 18
.Bold = True
End With
Message = "Hello World"
.CurrentX = (.Width - .TextWidth(Message)) / 2
.CurrentY = (.Height - .TextHeight(Message)) / 2
End With
Picture1.Print Message
End Sub
File System Object
The FileSystemObject object library, which is part of the Microsoft Scripting Runtime library (Scrrun.dll) provides an object-oriented approach to directories & files manipulation. For instance, system folder creation and deletion is one common task your code will need to perform. Naturally, before you attempt to either create or delete a folder, your procedure will want to determine if it exists. The FileSystemObject library provides the perfect solution.
First, you'll need to set a project reference to the Scrrun.dll. The FileSystemObject is the top-level object within the file hierarchy, and you create an instance of it just like you would with any other object variable:
VB6
Set oFSO = New Scripting.FileSystemObject
ASP
Set oFSO = Server.CreateObject("Scripting.FileSystemObject")
The FolderExists() method returns True if the folder exists and False if not. The CreateFolder() and DeleteFolder() methods create and delete folders respectively. All three of these methods require the full path to the folder in question. The following code shows how to use these methods (assuming you've set a reference to the Microsoft Scripting Runtime library):
If Not oFSO.FolderExists("C:\Test") Then
Call oFSO.CreateFolder "C:\Test"
End If
Call oFSO.DeleteFolder "C:\Test"
Set oFSO = Nothing
Wednesday, May 30, 2007

Basic SQL Syntax Troubleshooting
Developing dynamic web and/or desktop applications often involve querying the database for the desired data. One of the problems new programmers often run into is troubleshooting SQL syntax.
Here's a simple tip to help you troubleshoot your SQL syntax:
1. Write the SQL statement out to screen
2. Copy the SQL statement
3. Open the Access database
4. Create a new query
5. View the query text
6. Paste the SQL statement in the query window
7. Try to run the SQL statement
This should give you more info about the error you are running into.
But I am using SQL Server instead of Access database...
Don't worry, if you are running SQL Server or other databases, you can use Access and created linked tables to your database and take it from there.
OSPF - Wild Card Mask
Open Shortest Path First (OSPF) is an open standard, internal routing protocol, capable of supporting large network spanning multiple sites. Routers running OSPF are aware of their network topology; they get update of changes in the network through HELLO packets.
Some of OSPF's strengths include:
While many people get confused by the Wild Card Mask that is required in the Network statement, I find it's not that difficult at all.
Let's say you need to advertise the network 172.30.105.84 255.255.255.252 and wants to find the wild card mask. All you have to do is take 255 and subtract each octet of the subnet mask. So in this case you would advertise the network as:
Router(config)# router ospf {process number}
Router(config-router)# network 172.30.105.84 0.0.0.3 area 0
Where do you get the 0.0.0.3? Using the rule above, you take 255 - 255 = 0 (in the first 3 octets) and 255 - 252 = 3 (in the last octet). See, it's not that hard to find the wild card mask at all.
Where do I get 255 from, you ask? Each octet is made up of 8 bits and 255 is the maximum value that 8 bits can hold.
Here are some common OSPF commands that are very useful in checking the status of OSPF configuration:
show ip ospf
show ip ospf neighbor
show ip ospf interface
show ip route ospf
Further readings:
http://www.cisco.com/univercd/cc/td/doc/product/software/ios124/124cr/hirp_r/rte_osph.htm#wp1001842
http://en.wikipedia.org/wiki/Open_Shortest_Path_First
Some of OSPF's strengths include:
It converges quickly, compared to distance-vector protocol.
Routing update packets are small, and only reflect the change (it doesn't send the whole routing table).
It's not prone to routing loops.
It scales very well for large networks.
Bandwidth is taken into account when it selects a link to install in the routing table.
It support Variable-Length Subnet Masks (VLSM)
While many people get confused by the Wild Card Mask that is required in the Network statement, I find it's not that difficult at all.
Let's say you need to advertise the network 172.30.105.84 255.255.255.252 and wants to find the wild card mask. All you have to do is take 255 and subtract each octet of the subnet mask. So in this case you would advertise the network as:
Router(config)# router ospf {process number}
Router(config-router)# network 172.30.105.84 0.0.0.3 area 0
Where do you get the 0.0.0.3? Using the rule above, you take 255 - 255 = 0 (in the first 3 octets) and 255 - 252 = 3 (in the last octet). See, it's not that hard to find the wild card mask at all.
Where do I get 255 from, you ask? Each octet is made up of 8 bits and 255 is the maximum value that 8 bits can hold.
Here are some common OSPF commands that are very useful in checking the status of OSPF configuration:
show ip ospf
show ip ospf neighbor
show ip ospf interface
show ip route ospf
Further readings:
http://www.cisco.com/univercd/cc/td/doc/product/software/ios124/124cr/hirp_r/rte_osph.htm#wp1001842
http://en.wikipedia.org/wiki/Open_Shortest_Path_First
Updating IOS on ProCurve Switches
Updating IOS software on HP's ProCurve switches are pretty simple and straight forward. All you need to do is run a TFTP server, log into the switch, add an IP to the switch, specified a default gateway so the switch can talk to the TFTP server and download the new IOS.
SwitchA# vlan 1
SwitchA# ip address 192.168.1.9 255.255.255.0
SwitchA# exit
SwitchA# ip default-gateway 192.168.1.1
SwitchA# copy tftp flash 192.168.1.8 filename.swi
Note that when you do this the switch will download the new software and reboots itself when it's done processing the file. If you need to update both primary and secondary flash then you should find out whether the switch boots from primary flash or secondary flash and copy the other one first.
Let's say the switch boots from primary flash then the sequence of commands should be:
SwitchA# copy tftp flash 192.168.1.8 filename.swi secondary
SwitchA# y
SwitchA# copy tftp flash 192.168.1.8 filename.swi
SwitchA# y
This will let you update the IOS on both primary and secondary flashes before the switch reboots itself and save you some time. Plus you can script this and cut down the update time. If you do it otherwise, the switch will update primary flash, reboot and then you have to manually update the secondary flash.
Routing Information Protocol (RIP)
Routing Information Protocol (RIP) at one time was one of the most commonly used routing protocols on small, internal network. With the availability of other routing protocol such as IGRP, EIGRP, OSPF, IS-IS, BGP... plus the lack of support for large network the usage of RIP has been decreased and it is considered obsolete. For this reason, it's often referred to as "Rest In Peace" protocol.
Nonetheless, Cisco and other networking vendors are still making RIP & RIPv2 available today in their IOS models. I like RIP for the fact that it's very simple and easy to setup. You can get a small network running RIP up in just a few minutes. RIP is also a very good choice of protocol to get one familiarized with routing protocols.
Besides its infamous Pros and Cons, one lesser known fact about RIP is that you can also use it to load balance your network. However, beware of the fact that RIP does not take bandwidth into consideration when it installs learned routes into the routing table.
So let's say you have two ways to send a packet from A to B and the first path is going through a 128k line while the second goes through a T1 line; RIP will treat both paths equally as if they have the same bandwidth.
Suggested Readings:
http://en.wikipedia.org/wiki/Routing_Information_Protocol
http://www.cisco.com/univercd/cc/td/doc/cisintwk/ito_doc/rip.htm
Programmatically Ping A Networking Device
I would say Ping is one of the most popular software tool used to troubleshoot network issue. When a networking device or server goes down, one of the first things network engineers or system admininistrator do is try to ping it and see if it can be reached.
This blog will show you two ways to ping a device so you can integrate the ping feature into your application.
The first and easiest way to issue a ping command is to call the Ping method in the My.Computer.Network class:
If my.Computer.Network.Ping("www.google.com") Then
MsgBox("device up")
Else
MsgBox("device down")
End If
The drawback of this method is that it only gives you a boolean as the result to indicate whether the device is up or down.
The second way is to call the Ping.Send() method in the System.Net.NetworkInformation namespace which returns a PingReply through which you could get more detailed information about the ping:
Dim myPing As New System.Net.NetworkInformation.Ping
Dim PR As System.Net.NetworkInformation.PingReply
PR = myPing.Send("www.yahoo.com")
If PR.Status = IPStatus.Success Then
MsgBox("Reply from " & PR.Address.ToString & ": BYTES=" & PR.Buffer.Length & " TIME<" & PR.RoundtripTime & "ms TTL=" & PR.Options.Ttl)
Else
MsgBox(PR.Status.ToString)
End If
There you have it. Two ways of pinging a networking device. I recommend that you further study the PingReply object to get more information from the ping reply.
Parsing Text File
I often come across various postings in different forums asking for simple things like reading information from text file and parsing data from the text. Well, I get kind of tired of answering those question so I decided to write a blog about it and then point them to the blog. So here it is.
Now the text file named C:\Test.txt I have two simple line:
Firstname: Brian
Lastname: Dao
and I want to grab "Brian" & "Dao" out to use for some other purpose. The code is listed below:
Dim mySR As System.IO.StreamReader
Dim myFirstName, myLastName, myTempStr As String
mySR = System.IO.File.OpenText("C:\Test.txt")
If Not mySR.EndOfStream Then
myTempStr = mySR.ReadLine
myFirstName = Mid(myTempStr, InStr(myTempStr, "Firstname:", CompareMethod.Text) + 10)
myTempStr = mySR.ReadLine myLastName = Mid(myTempStr, InStr(myTempStr, "Lastname:", CompareMethod.Text) + 9)
End If
txtOutput.Text = myFirstName & vbCrLf & myLastName
mySR.Close()mySR = Nothing
Note that this doesn't take care of the leading space which could be trimmed by:
myTempStr.Trim
or
myTempStr = Trim(myTemStr)
Another way of accomplishing the same thing would be to call the Replace method and pass in the required parameters. The code sample below show two different ways you can call the Replace medhod.
myFirstName = Replace(myTempStr, "FirstName:", "", , , CompareMethod.Text)
myFirstName = myTempStr.Replace("FirstName:", "")
For those who are new to all this, be sure to look up the following string processing methods: InStr, InStrRev, Replace, Mid.
Adding Attributes To An Existing XML Document
In the previous blog, I've demonstrated how to add a node or an XML element to an existing document. In this blog, I'll introduce two ways to add an attribute to an existing node.
The first way we will use the SetAttributeNode method of the DocumentElement object to add an XMLAttribute as seen below:
Dim objDocument As New XmlDocument
objDocument.LoadXml("<Cars><Make>Toyota</Make></Cars>")
Dim objAttribute1 As XmlAttribute
objAttribute1 = objDocument.CreateAttribute("Type")
objAttribute1.InnerText = "Foreign"
objDocument.DocumentElement.SetAttributeNode(objAttribute1)
The second way is to add an attribute is to call the Append method of the Attributes collection class:
Dim objAttribute2 as XmlAttribute
objAttribute2 = objDocument.CreateAttribute("Body")
objAttribute2.Value = "Sedan"
objDocument.DocumentElement.FirstChild.Attributes.Append(objAttribute2)
and finally we can show the output to the textbox with the statement:
txtOutput.Text = objDocument.InnerXml
In the end, if you run these two code blocks together, your output should look something like this:
<Cars Type="Foreign"><Make Body="Sedan">Toyota</Make></Cars>
Tuesday, May 29, 2007
Adding Nodes using InnerText Property and CreateTextNode Method
In this blog, I'll discuss two simple ways of adding a node to an existing XML document.
Before we do anything, we will need to declare an XMLDocument and call the LoadXML method which takes an XML string as the parameter to populate the document
Dim objDocument As New System.Xml.XmlDocument
objDocument.LoadXML("<Cars></Cars")
Doing this, we will obtain a document with the root node as Cars and no child element.
In the first method, we will create the element using the CreateElement method, then create an XMLText object and set the value using CreateTextNode method, add the text object to the XML element before adding it to the document as follow:
Dim objElement As System.Xml.XmlElement
Dim objText As System.Xml.XmlText
objElement = objDocument.CreateElement("Make")
objText = objDocument.CreateTextNode("Honda")
objElement.AppendChild(objText)
objDocument.DocumentElement.AppendChild(objElement)
'these last too lines produce the same result as the previous two
'objDocument.DocumentElement.AppendChild(objElement)
'objDocument.DocumentElement.LastChild.AppendChild(objText)
The second method is much simpler. We create an element using the CreateElement method of the XMLElement object, set its value in the InnerText property and add it to the document using AppendChild method:
Dim objElement As System.Xml.XmlElement
objElement = objDocument.CreateElement("Make")
objElement.InnerText = "Toyota"
objDocument.DocumentElement.AppendChild(objElement)
There you have two ways of adding a new element to an existing XML document. I prefer the second method as it is much simpler, less coding and easier to understand.
TIPS: You can quickly show the content of the XML document by sending its content to a textbox using the following statement:
txtOutput.Text = objDocument.InnerXml
Introduction to XML
For those of you just starting out with XML, I highly recommend that you check out the video tutorial(s) below:
VB
Working with XML & VB.net
C#
Working with XML & C#
VB
Working with XML & VB.net
C#
Working with XML & C#
Friday, May 25, 2007
Optimize Your Website For Performance
Performance can affect the number of visitors come to your site. The faster the site load, the better experience the visitors will get and the chances of them coming back will also be higher.
Network latency, congestion, packet drops... are already reducing your application performance. If you, the developer, can do anything to speed up content delivery, by all means, you should do it.
Unfortunately, most developers often neglect to pay attention to this are since it's not something they can really visually see and fix because there is no error that will popup and say "Hey, I am slow... fix me..." or something like that.
Here are a few tips that any developer can use to help speed up their web pages:
If you get the opportunity, you should examine the HTML output for well known sites like Yahoo or Google and see how they optimize their site for performance. Chances are you will see these tips in action.
Network latency, congestion, packet drops... are already reducing your application performance. If you, the developer, can do anything to speed up content delivery, by all means, you should do it.
Unfortunately, most developers often neglect to pay attention to this are since it's not something they can really visually see and fix because there is no error that will popup and say "Hey, I am slow... fix me..." or something like that.
Here are a few tips that any developer can use to help speed up their web pages:
These tips will not significantly improve the performance of your web site as that will also depend upon how you compose your application but it will definitely improve the delivery of the page to the visitors. This is especially true if you have high traffic on your site.
Put CSS code at the top of the page: if you put CSS at the top of the page, the browser will read it first. When the browser renders a web page, it doesn't have to search up and down looking for the style rules.
Move JavaScript code down to the bottom of the page: JavaScript’s are mostly run on the client side AFTER the page has been rendered. Moving them to the bottom of the page will allow the browser to render other markup tags first and present the UI to the client faster.
Compress java scripts & remove white space: The browser doesn't care if you name your function with a single character nor does it care if the name is 50 characters as long as they are valid. White spaces might make your code look good but will not help when it comes to speed. The less data your server has to spit out the faster your page will be delivered over the wire.
Remove duplicate and/or unused scripts: If it's not being used, remove it. If anything, it will cause more load on your network and create more confusion having it there when it comes time to troubleshoot some problems.
Do not mix Javascripts and HTML markups: Sometimes, you will need to use Javascripts to produce HTML markups. But try to reduce this to a minimum and let the browser finish one thing before it starts the next one (ie: complete HTML render before executing javascript...)
Move CSS & Javascripts out of HTML markups: Don't make the browser go back and forth between HTML markups and javascripts when it renders the page as there is a performance cost to this.
Add expires header: The browser save the pages onto the hard disk so that it can load the same site faster next time around. If there isn't a need for this, add expires header to it doesn't write the pages to disk.
Disable viewstates: ASP.net pages have viewstate enabled by default which adds a bunch of encrypted code to the page. If viewstate is not required, disable it and it will improve the page performance.
If you get the opportunity, you should examine the HTML output for well known sites like Yahoo or Google and see how they optimize their site for performance. Chances are you will see these tips in action.
Thursday, May 24, 2007
Smurf Attack
A smurf attack is a Denial of Service (DoS) attacked that uses spoofed broadcast ping messages to flood the target system with ping replies. The attack method gets its name after its exploit program.
In this attack, an attacker sends out a large number of ICMP Echo Request packets to IP broadcast addresses with all requests having a spoofed source address of the intended victim. Once the routing device receives this type of request, it will broadcast it to all hosts on its network. When the hosts reply, they will overwhelm the targeted's network with so much traffic that it will effectively shut out the network from the rest of the world.
Using a Cisco router, one can issue the command:
no ip directed-broadcast
to secure their network from this type of attack.
Note that this does not prevent a network from becoming the target of a smurf attack; it just prevent the network from taking part in an attack agains other networks.
Ping Flood Attack
A ping flood is a simple Denial of Service (DoS) attack where the attacker sends a massive number of ICMP Echo Request (ping) packets to the victim in hope of overwhelming the victim and consuming both outgoing and incoming bandwidth on the victim's network. An effective attack could render the victim's network useless.
This type of attack only succeeds if the attacker has more available bandwidth than the victim (like a T3 versus and DSL line) which is very unlikely. To get around this, the attacker normally use an army of computers (a network of computers that attacker has control called zombies or bots) numbered in the hundreds or thousands to attack the victim with their combined bandwidth power.
Defense Your Network
To reduce the effects of ping flood attack, one can use a firewall to inspect the traffic and filter ICMP Echo Request packets. However, doing this can also have its side effects such that it prevents legistimate users from pinging their hosts. For this reason, we can use firewall to authorize ICMP Echo Request packets from legistimate source only.
Reading Text File Into Combo Box
In the previous blog (Reading Text File Using StreamReader Class), I demonstrated the use of StreadReader class to read text file. The System.IO.File class also provide us with a couple of ways to read text file as well.
We will use it's capability in this blog to read the data from text file and load it directly into a combo box.
Code sample:
string[] theStates;
theStates=System.IO.File.ReadAllLines(txtFilename.Text);
cboStates.Items.AddRange(theStates);
A sample application is available here.

We will use it's capability in this blog to read the data from text file and load it directly into a combo box.
Code sample:
string[] theStates;
theStates=System.IO.File.ReadAllLines(txtFilename.Text);
cboStates.Items.AddRange(theStates);
A sample application is available here.
Reading Text File Using StreamReader Class
The namespace System.IO has a class called StreamReader which can be used for reading text files.
The StreamReader class provides us with a couple of methods and a property as listed below:
To read a text file, we need to open it using System.IO.File.OpenText method which returns a StreamReader object. Once we obtain the StreamReader object, just call the appropriate method to pull the data.
C#
System.IO.StreamReader oSR;
oSR = System.IO.File.OpenText(sFilename);
txtOutput.Text = oSR.ReadToEnd();
VB
Dim oSR As System.IO.StreamReader
oSR = System.IO.File.OpenText(sFileName)
txtOutput.Text = oSR.ReadToEnd()
For further reading, please visit the this link.
Sample applications can be downloaded here: VB.net or C#
The StreamReader class provides us with a couple of methods and a property as listed below:
Close: Closes the StreamReader object and the underlying stream, and releases any system resources associated with the reader.
Peek: Returns the next available character but does not consume it.
Read: Reads the next character or next set of characters from the input stream.
ReadLine: Reads a line of characters from the current stream and returns the data as a string.
ReadToEnd: Reads the stream from the current position to the end of the stream.
To read a text file, we need to open it using System.IO.File.OpenText method which returns a StreamReader object. Once we obtain the StreamReader object, just call the appropriate method to pull the data.
C#
System.IO.StreamReader oSR;
oSR = System.IO.File.OpenText(sFilename);
txtOutput.Text = oSR.ReadToEnd();
VB
Dim oSR As System.IO.StreamReader
oSR = System.IO.File.OpenText(sFileName)
txtOutput.Text = oSR.ReadToEnd()
For further reading, please visit the this link.
Sample applications can be downloaded here: VB.net or C#
Monday, May 21, 2007
ViewState and Postback
I see a lot of people having problem preserving the controls's state when they perform postback. Most of these due to the fact they that don't quite understand how the form is processed on postback as seen in the following questions:
http://www.vbdotnetforums.com/showthread.php?t=18985
http://www.vbdotnetforums.com/showthread.php?t=19534
Have a look at this code snippet:
Protected Sub Page_Load(ByVal sender As Object, ByVal e As System.EventArgs) Handles Me.Load
If Not IsPostBack Then
....
End If
LoadComboBoxes()
End Sub
IsPostBack will yield a True value if the page was posted back. You can use this to see whether this is the page load or refresh versus a post back and take appropriate action.
Let's say in the method LoadComboBoxes() you query the data from SQL and load that into the combo boxes. If you don't check for postback using IsPostBack, one of two things will happen:
1. If data binding is used on the controls or the Clear() method is called, all the state information gets wiped out and the controls will not retain their values.
2. If the Clear() method is not called then the combo boxes might have duplicate items added everytime you do a post back.
The recommended way for doing this is to move LoadComboBoxes inside the If statement that way it gets called once and also preserves postback data.
Sunday, May 20, 2007
Access IIS application from computers on the same network
A user was having problem accessing his website on the network. The site is working fine from the local machine. However, when he tries to access the same site from a computer on the network, it's not working.
The problem and attempted answers can be viewed in this post. You should read the posts in that forum before continuing on this blog so things would make sense when you read the paragraphs below.
Let's logically work through the posts and try to sort out the problems:
1. Setting up a new website, IP address and port number is not necessary as the original site already working on the machine IIS is running from. Since all the computers are on the same network, you should be able to access it by computer name as well.
2. On Win XP, you can actually host more than one sites and running more than one IP on the same computer. But this won't be discussed in this blog. On top of that, it's not even relevant to the problem we are trying to solve.
3. This shouldn't be security issue also since IIS applications typically run on anonymous account by default and permission is granted when the site is set up; unless you specifically make change to it.
The true answer to this lies in Windows XP Pro SP2's built-in Firewall. Open port 80 in Windows Firewall to allow web traffic should solve this issue. If there are other software firewall running, check and open port 80 as well.
Brian Dao
Short Circuit Evaluation
What is Short Circuit? In the simplest terms, Short Circuit is a control structure put in place to allow the control of the program to be passed onto a different set of instructions while minimizing the evaluation of the code. It operates on booleans or boolean expressions in which the second boolean or boolean expression is only evaluated if the first one does not suffice to determine the value of the entire expression.
Consider the following example:
bool hasMoney = false;
double totalMoney = 0;
if (hasMoney && totalMoney > 5)
{
MessageBox.Show("Buy burger.");
}
If we have no money (hasMoney=false) then there is no need to check and see if the amount of money we have is greater than 5 bucks so the boolean expression on the right hand side of boolean operator "&&" will not be evaluated in this case.
You can really appreciate short circuiting in the following example:
bool hasMoney = false;
double totalMoney = 0;
if (hasMoney && checkTotalMoney())
{
MessageBox.Show("Buy burger.");
}
As you can see, this is just a simple example to demonstrate how short circuit evaluation works but what if in the method checkTotalMoney() you have some lengthy code that goes on to evaluate if you have enough money to pay for the burger and the taxes as well?
Things just get a little bit more complicated and you can see all of that work is skipped if the boolean expression on the left of the operation becomes false. This is important to consider because if you have checkTotalMoney() on the left, the method will be evaluated to determine its value before it can move on to the second expression on the right hand side.
Knowing how short circuit evaluation works and carefully design expressions that use conditional logical operators you can greatly improve your code and boost the performance of your applications by avoiding unnecessary work. You can read more about short-circuit evaluation here.
Friday, May 18, 2007
Converting from Decimal to binary and back
This project was written in C# to demonstrate how to convert data from Decimal to Binary and from Binary back to Decimal number.

There are a number of ways to convert Decimal to Binary. Here, I used a small function to basically loop through and use division by 2 to convert the decimal number to binary format. Here's the code for the function:
private static string Dec2Bin(Int64 nDecimal)
{
Int64 nBinaryDigit;
string sBinaryNumber = "";
while (nDecimal > 0)
{
nBinaryDigit = nDecimal % 2;
sBinaryNumber = nBinaryDigit + sBinaryNumber;
nDecimal = nDecimal / 2;
}
return sBinaryNumber;
}
To convert Binary number back to Decimal, we can use the built-in function called Convert as seen in the code snippet below:
txtToDecimal.Text = Convert.ToInt64(txtFromBinary.Text, 2).ToString();
You can download the C# project sample here.
Thursday, May 17, 2007
More on Remote Desktop
You can make your HDs available on the RDPed target by going to Options - Local Resources - check Disk Drives option. This will allows you to copy files between your machine and the RDPed machine.
Windows XP SP2 & Windows Server 2003 SP1 has Firewall built in. This will block RDP traffic and on Remote Desktop is disabled by default. When troubleshoot RDP look in these areas first.
RDP runs on port 3389 by default. Most companies deploy firewall to protect their servers. In order to RDP to them, you would need to open traffic on this port (or which ever you choose to run RDP on) to the servers.
Remote Desktop and then some
By default, RDP only allows you to have 2 people login remotely at the same time to work on the server (with Remote Desktop for Administration setting). You can also have another person logon at the console so that makes 3 people can work on the server at the same time.
Here's a little known tip: You can emulate the console login so you don't have to be right in front of the console to login as the 3rd person and have 3 people RDPing at the same time.
To emulate console login, use the following Command line syntax:
mstsc /v:servernameorip /console
You can also shorten /console to /c to save some typing.
If you have to RDP into your servers, it's a good security practice to always try to VPN in and then RDP to the machines if you can. Otherwise, if firewall or router permits, then only allows RPD from known location (your office, your home IPs...). And as the last resort, open RDP port for access from any where.
Centering content on a web page
This is a very simple technique but if you take advantage of it, you could create very attractive web pages with it.
What you need to do is to create a table to wrap the content of your webpage in and set both the width and height properties of the table to "100%". For the horizontal alignment property of the cell, make it "center". You should also set the vertical property to "middle". By default, the browser will set this value to "middle" but it wouldn't hurt to explicitly set it yourself. If anything at all it would only make the code clearer and easier to understand.
Here's the sample code:
<table border="0" width="100%" height="100%">
<tr>
<td align="center" valign="middle">
Your content goes here.
</td>
</tr>
</table>
With this code in place, when you resize the browser, the table size will be updated and the content will be re-render to center it within the page.
Wednesday, May 16, 2007
Using Master Pages in ASP.net Web Applications
Master page helps you to create a consistent look and feel to your site while minimizing the amount of work you have to do. With the introduction ASP.net 2.0 Master Pages, you no longer have to use server side includes to keep the site consistent among different pages. To be able to use and apply master page to your site you first need to create a master page:
1. Right click on the Project
2. Click Add New Item
3. Change the filename as appropriate then click OK to accept
4. Design the layout of the page as you wish and save it
Note that the design in the master page will be applied to all pages that use it except for the content part.
Now that we have a master page, we can start using it. Let's create a web page that would use the master page.
1. Right click on the Project
2. Click Add New Item
3. Select Web Form
4. Check the box called Select Master Page
5. Select the master page you just created and hit OK.
At this point, the code window will open up for you to edit. The new web page doesn't look like a typical web form but instead it will look something like this:
<%@ Page Language="VB" MasterPageFile="~/MasterPage.master" Title="Untitled Page" %><asp:Content ID="Content1" ContentPlaceHolderID="ContentPlaceHolder1" Runat="Server">
your code goes here
your code goes here
</asp:Content>
When you run the application and/or browsing to the web form, IIS will merge both the master page and the web form to produce the finale code and send it to the browser.
Now that you know how to use master page, you might want to take a look at this blog to learn how to dynamically change master page at run time
1. Right click on the Project
2. Click Add New Item
3. Change the filename as appropriate then click OK to accept
4. Design the layout of the page as you wish and save it
Note that the design in the master page will be applied to all pages that use it except for the content part.
Now that we have a master page, we can start using it. Let's create a web page that would use the master page.
1. Right click on the Project
2. Click Add New Item
3. Select Web Form
4. Check the box called Select Master Page
5. Select the master page you just created and hit OK.
At this point, the code window will open up for you to edit. The new web page doesn't look like a typical web form but instead it will look something like this:
<%@ Page Language="VB" MasterPageFile="~/MasterPage.master" Title="Untitled Page" %><asp:Content ID="Content1" ContentPlaceHolderID="ContentPlaceHolder1" Runat="Server">
your code goes here
your code goes here
</asp:Content>
When you run the application and/or browsing to the web form, IIS will merge both the master page and the web form to produce the finale code and send it to the browser.
Now that you know how to use master page, you might want to take a look at this blog to learn how to dynamically change master page at run time
Dynamically changing master page on your website
If you notice, you will see that a lot of blog sites out there allow you to create and use different site template. With a click of a button, you can completely change the look and feel of the entire site; including the theme, layout, navigation...
While this can certainly be done using classic ASP, ASP.net master pages have made it extremely easy to set this up. All you have to do is define a couple of master pages before and change MasterPageFile property at run time.
Protected Sub Page_PreInit(ByVal sender As Object, ByVal e As System.EventArgs) Handles Me.PreInit
Page.MasterPageFile = "NewMasterPage.master"
End Sub
In this code snippet, I just assign a new master page to the MasterPageFile property of the Page object during the preinit stage and the site gets a new look.
If you are new to master pages, please have a look at this blog: Using Master Pages in ASP.net Applications.
Sunday, May 13, 2007
Create View Source Link
This blog will show you how to create a hyperlink on a Web page that displays the source code for the current page or another page when the hyperlink is clicked.
The normal Anchor tag when associate with the HREF parameter will cause the browser to pull the URL and display the page when the anchor link is clicked on. However, if you add the "view-source" prefix in front of the link, it will cause the browser to display the HTML source for the page instead of the rendered page itself.
Being able to display the source code of a web page is extremely valuable especially if you want to be able to show your site visitors how to do certain things or teach beginners how to compose HTML documents.
Keep in mind that "view-source" works only on absolute links. Also, if you are trying to access an HTML file through the FILE protocol, you must fully qualify the URL which means you have to include the full path to the file.
Here's the source code to create view source link:
<a href="view-source:http://yoursite.com/FileName.htm">Source Code</a>
Adding Your Logo to a Bookmark
Ever wonder how you could add your logo or icon to your website's URL so that when people bookmark it, they will see the logo along with the URL itself?
It's actually pretty simple to do this. What you need is a 16x16 icon in 16 colors and make a link to it in your webpage.
Here's the sample code for it:
<HEAD>
<LINK REL="SHORTCUT ICON" HREF="http://www.yoursite.com/favicon.ico">
</HEAD>
http://www.yoursite.com/ is the URL to your website and favicon.ico is the name of your icon. You could, of course, use a different name if you want. But keep in mind that even though this might looks good, it is an Internet Explorer specific feature so it won't work on other browsers (or at least at the time this was written)
Saturday, May 12, 2007
Add Multithreading to your VB.NET Applications
VB.NET natively supports free threaded applications. In plain English, this means you can split up your application into multiple threads so that it can do different things at the same time.
There are many situations in which spawning a new thread to run in the background will make your application more responsive and increase its usability. Consider the following example:
Public Class Form1
Private sMessage As String
Private Sub Form1_Load(ByVal sender As Object, ByVal e As System.EventArgs) Handles Me.Load
CountUp()
End Sub
Private Sub Button1_Click(ByVal sender As System.Object, ByVal e As System.EventArgs) Handles Button1.Click
MsgBox(sMessage)
End Sub
Private Sub CountUp()
Dim I As Integer
For I = 1 To 10
sMessage = "Iteration #: " & I
System.Threading.Thread.Sleep(2000)
Next
End Sub
End Class
In this simple example, we are just counting from 1 to 10. Note that when each counter is increamented the computer would wait 2 seconds before process the next instruction. So when the routine CountUp is invoked, it would run for approximately 20 seconds. During that time, your application can't do anything else thus you can't click on Button1 to see the message.
To execute code in a thread, we need to use the Thread object that is a part of the System.Threading namespace in the .NET framework classes. The first thing we need to do is to instantiate a new Thread object and pass to it the address of the code block we want to run under the thread and then invoke the Start method.
The example above could be modified as below:
Private Sub Form1_Load(ByVal sender As Object, ByVal e As System.EventArgs) Handles Me.Load
Dim myThread As System.Threading.Thread
myThread = New System.Threading.Thread(AddressOf CountUp)
myThread.Start()
End Sub
Now when you run the application again, it will be more responsive and if you keep clicking on Button1, you will see the message changes as the application runs.
Redirect user to another pager after x seconds using Meta tag
In this blog you will learn how to redirect the users to another page/site after a number of seconds using meta tag.
Sometimes to be able to redirect your site visitors to another page automatically will come in handy, especially when you want to inform them that your site has been "moved" to a different URL so they can update their bookmarks.
To redirect the visitors to another page after a specified number of seconds, all you have to do is add the meta tag <META HTTP-EQUIV=" REFRESH" CONTENT="xxx; URL=newpage.htm"> to the header section of your page where xxx is the number of seconds to delay and newpage.htm is the URL of the page you want the visitors to go to.
Here's the code for it:
<html>
<head>
<META HTTP-EQUIV="REFRESH" CONTENT="3; URL=newpage.htm">
</head>
</html>
In this example, the browser will send the user to newpage.htm after 3 seconds.
Making a window focus - Javascript
At times, you will want to make a page active or re-gain focus after it has been loaded. You probably have seen a lot of these already while surfing the internet, especially from sites that has a lot of pop up ads.
One simple line of Javascript code window.focus(); will make the loading window gain focus. Alternatively, you might want to wait for the window to completely finish loading before you making it gain focus. To do so, simply add window.focus(); in the tag of the document along with the onload event.
Here's the code:
<HTML>
<Body onload="window.focus();">
</HTML>
Another way is to put the script at the very last line of code, just before tag as seen in the code below:
<HTML>
<Body>
...
...
<script language=javascript>
window.focus();
</script>
</Body>
</HTML>
Subscribe to:
Posts (Atom)